Host a DCS Server in AWS
How to Host DCS Dedicated Server in AWS
Update - 22/03/06: I've produced a youtube version of this blog post
I originally looked into AWS when I noticed the pings in my group were skewed and figured it might be a cheap way to geographically centralise the DCS server to get smoother play for epic formation flying. Since we'd only be online for a few hours at a time, a way that avoided the expense of an always-on service was appealing. Let me show you how, directly with AWS.
You will need an AWS account with a linked credit card. This exercise will cost a dollar or two. If you inadvertently launch some particularly expensive services or forget to terminate services when you're done, it might be a bit more.
1. Sign up for AWS
Sign into the AWS console https://aws.amazon.com/console
2. Choose a Region
The region is selected in the nav bar in the top right hand corner of the screen.
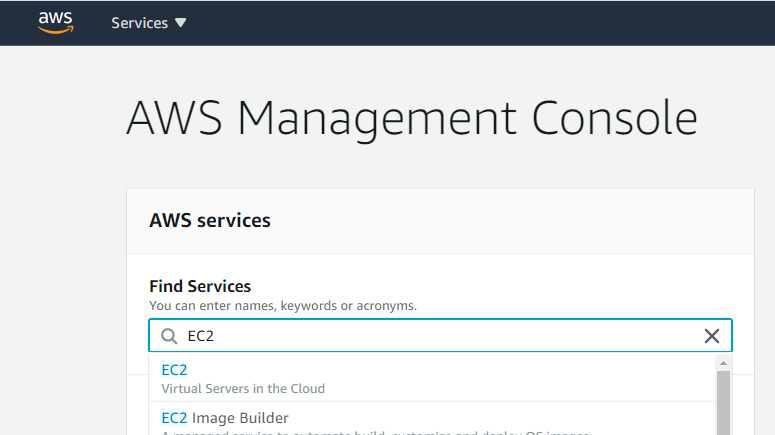
3. Launch an EC2 Instance
AWS offers a lot of different services depending on your needs. The service we need for a Windows virtual machine is EC2 (Elastic Complute Cloud).
1. Choose an Amazon Machine Image (AMI)
DCS is windows software, so any windows image will do. I recommend 'Microsoft Windows Server 2019 Base'.
2. Choose an Instance Type
The recommended system requirements for DCS server are 8GB RAM, and Solid State Disks (SSD). Note that EBS (Elastic Block Store) refers to network discs, and won't perform as well as local SSDs. I recommend the i3.large as the most afforable instance with suitable SSDs.
The US East region on demand price at the time of writing is $0.187 per Hour, but keep in mind data served when running DCS and provisioned EBS volumes represent additional costs. Otherwise until DCS makes better use of multiple cores, the z1d instances with thier higher clock frequency might be worth considering for extra performance.
3. Configure Instance Details
The defaults are fine. Spot instances are worth considering. A spot instance is cheaper, but not always available.
4. Add Storage
The defaults are fine. We will primarily be using the SSD storage that comes with the instance rather than any EBS volumes provisioned here.
5. Add Tags
The defaults / no tags are fine.
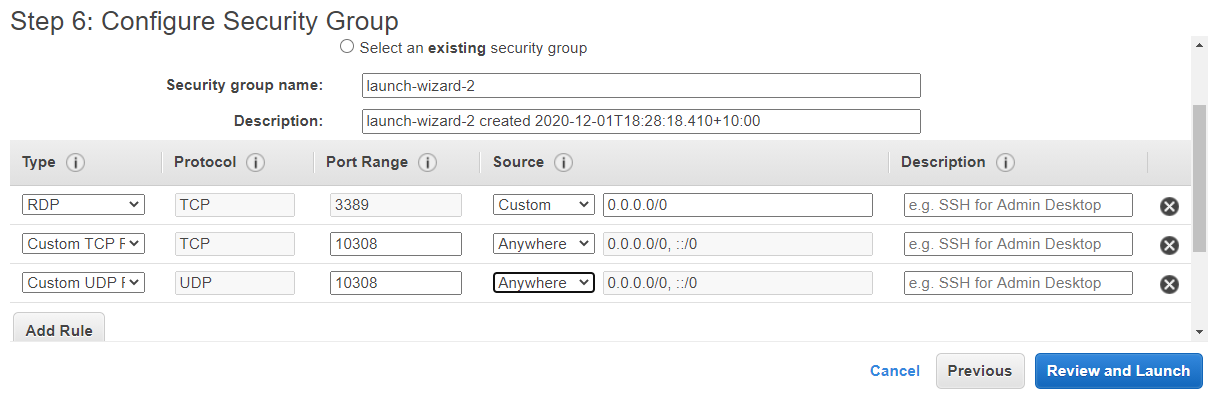
6. Configure Security Group
This is where we configure the ports we will be exposing. In addition to the entry for RDP (Remote Desktop Protocol) which will give us remote access to our instance, we need to configure access to the ports DCS will use: port 10308 for both TCP & UDP.
7. Review and Launch
Launching will prompt you to create a key pair, this will be needed to connect via Remote Desktop.
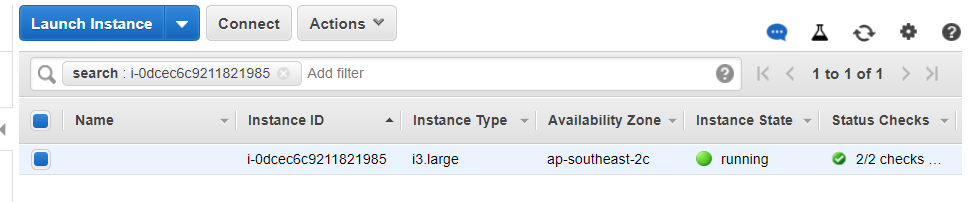
4. Connect and configure Windows
Find the new instance in the web console, click connect and follow the instructions. If eveything has worked out so far, we'll be greeted with a Windows desktop.
Setting up our windows instance for DCS
Essential configuration
We need to allow the inbound connections for DCS. By default, windows server firewall will refuse connections. Given AWS is already limiting connections, for simplicity we can just turn off the windows firewall. This can be done with the following powershell command:
Set-NetFirewallProfile -Profile Domain,Public,Private -Enabled False
We will need to format the attached SSD disc so we can use it. Find the disc management console by type 'server manger' into windows start.

Nice to have configuration
We can turn off windows defender to save on cpu with the powershell command:
Set-MpPreference -DisableRealtimeMonitoring $true
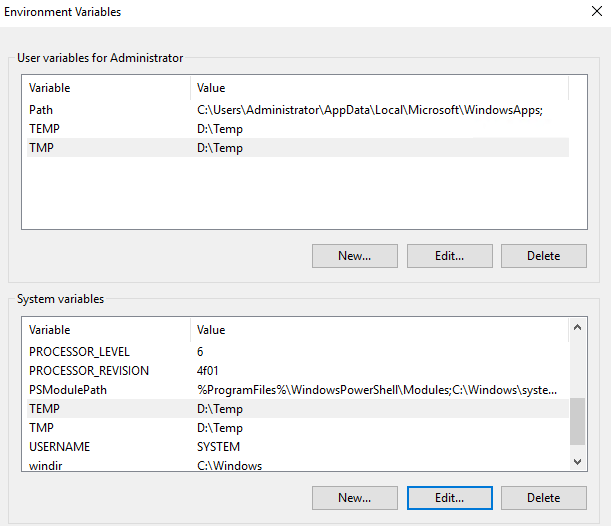
Update the windows temp location. DCS Server does make use of temp files, so we can potentially improve performance by moving the temp file location from the EBS volume to the SSD. Type 'View advanced system settings' into window start, click 'Environment Variables' and update TEMP and TMP to locations on the newly formatted SSD.
5. Install and run DCS
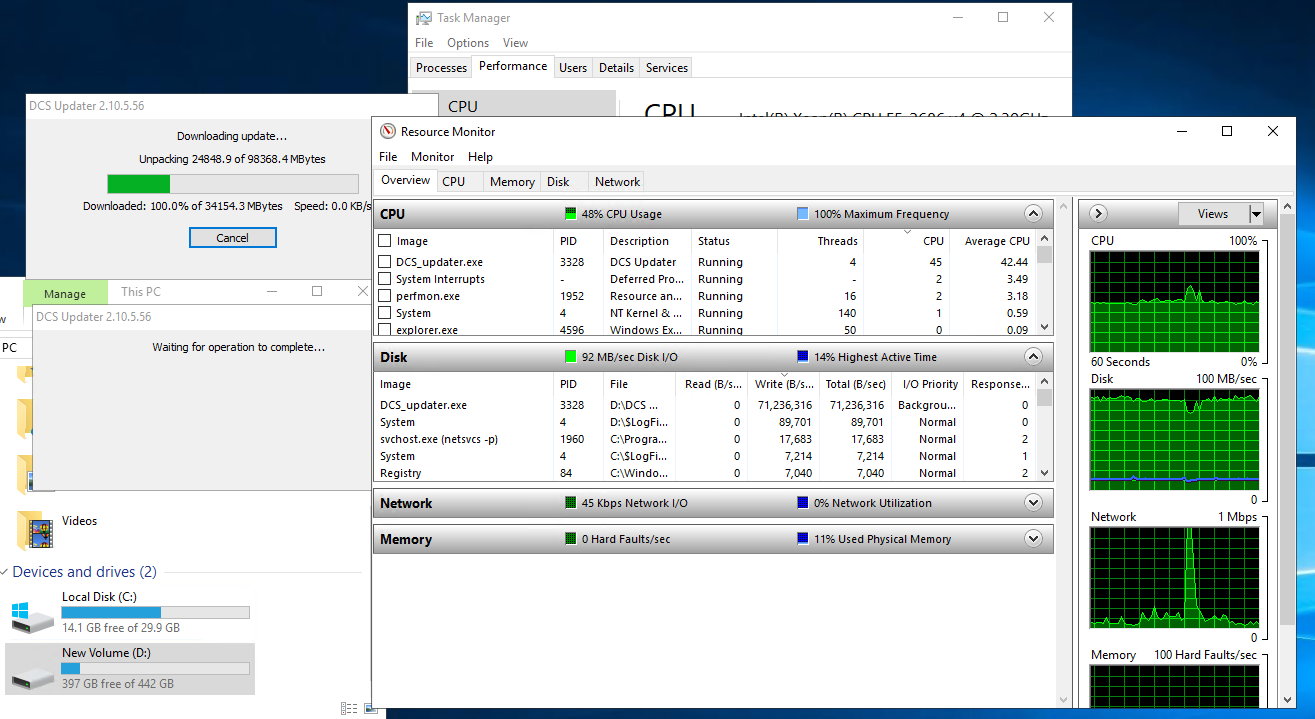
Download and run the DCS installer ensuring its installed onto the SSD drive.
This process can take a while. I find its about 50 minutes with an i3.large.
Once the installation is complete, create the folder "C:\Users\Administrator\Saved Games\DCS.openbeta_server\Missions" and drop in a .miz file
Start the server with
D:\"DCS World OpenBeta Server\bin\DCS.exe" --server --norender
Install chrome and navigate to file:///D:/DCS%20World%20OpenBeta%20Server/WebGUI/index.html for the DCS Server web console.
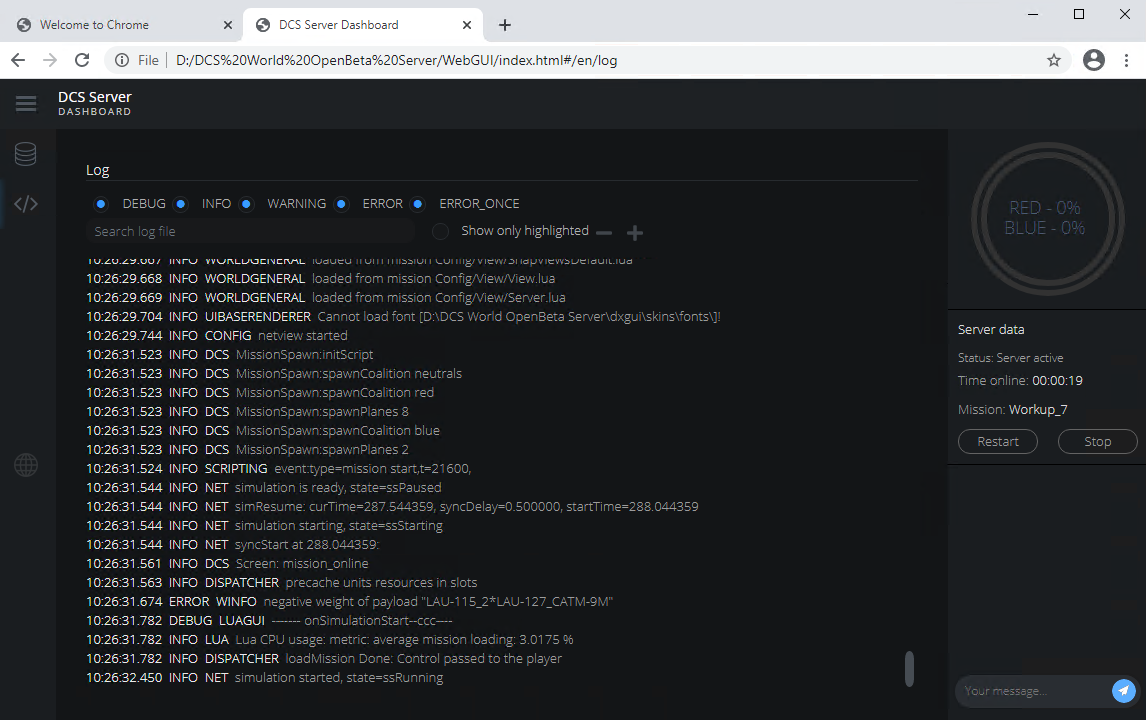
From the web console the mission can be selected and started, at which point we should find our mission in the multiplayer lobby

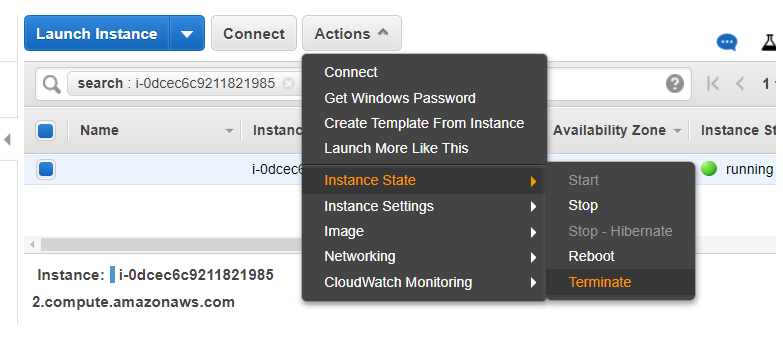
Shutdown
When we're done, back on the EC2 console we can terminate our instance. This frees up all the resources that were committed with no further expense.
Summary
We ran DCS in the cloud, cool!
And it cost a bit of time and a couple of bucks. It's hard to exactly account for the cost until we get the bill from AWS at the end of the month since AWS will include charges for things like renting the IP address, but the primary cost is the EC2 instance, and depending on how many players are connecting, the outbound data as well.
The main tradeoff was the time taken to configure everything and get DCS installed and running. The ephemeral architecture of the cloud means we need to do this each time we provision a new instance which is a bit awkward. On the i3.large it took ~50 minutes for the full DCS installation to complete. A lot of the time was decompressing the download so more CPU might speed that up a bit. ready-room.net works around this however by caching the game assets in S3.
I'd just like to thank SamKarim for the excellent Azure post that helped me figure this out for AWS.
Cheers